

The Queen Tote – a filet crochet bag

A crochet tote fit for a QUEEN — The Queen Tote. Keep reading if you’d like to know more about how this bag came about or just scroll down and get right to the free pattern.
So…it’s officially summertime now, which means it’s time to make all the things that let the sunshine in. Many beach days are quickly approaching, so I figured, why not get prepared for that? If you’ve been following me for a while, then you know that bags (of any kind) are my first love…clutches, handbags, totes, duffles, you name it! What makes those bags even better is when they say things…am I right?

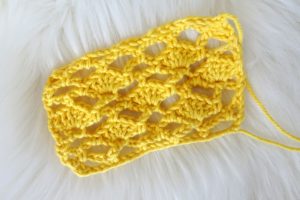
Filet crochet is my jam this summer because not only does it allow the cool air in during these hot summer days, but it also works up quickly — and that’s always a plus. I chose the filet crochet technique for this bag specifically with sand in mind. The mesh is small enough to keep items in, but also large enough to shake out debris. The other great thing about filet crochet is that it uses charts. These charts can be used not only for filet crochet, but also intarsia, tapestry, and tunisian crochet! If you want to make your own pouch click here to learn the basics of tapestry crochet!

For this bag, I used a chart from a pouch that I made a while back so I didn’t have to much thinking about this design. I just made a gauge swatch (because one must ALWAYS swatch) to check the size and got to work! This pattern is easily adjustable because it utilizes the filet crochet technique. All you have to do to adjust the size is change the hook size….simple right?
So without further ado… let’s make the Queen Tote.

The Pattern
CLICK HERE to pin for later…
Finished Size:
- 14.5 inches tall × 16.5 inches wide
Materials
- F/3.75 crochet hook
- 3 skeins of 100% cotton yarn (Sample made with Hobby Lobby I Love This Cotton)
- Scissors
- Yarn Needle
- Your favorite Netflix show
Abbreviations
Ch – Chain
St – Stitch
Sts – Stitches
Dc – Double crochet
Sc – Single crochet
Sk – Skip
Sp – Space
Rep – Repeat
Rs – Right side
Ws – Wrong side
Start here…
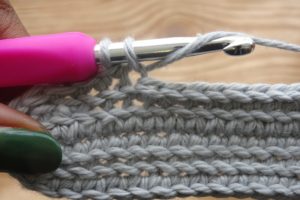
Row 1: Double crochet foundation chain (81). Turn.
Rows 2-8: Ch 4 (counts as Dc plus ch 1). Sk next st. Dc in next st. *Ch 1. Sk next st. Dc in next st. Rep from * to end of row. Turn.
Row 9-27: Start chart lettering. Left handers: Start working chart at bottom left box. Right handers: Start working chart from bottom right box. Be sure to establish a Rs and Ws of your work.

Row 28: Ch 1. Sc in 1st st. *Sc in ch 1 sp. Sc in next st. Rep from * to end. Turn.
Row 29: Ch 1. Sc in next 19 sts. Ch 1. Sk next 2 sts. Sc in next 38 sts. Ch 1. Sk next 2 sts. Sc in last 20 sts. Turn. (81)
Row 30: Ch 1. Sc across row working 2 Sc in ch 1 sp.
Fasten off.
BACK PANEL
Row 1: Double crochet foundation chain (81). Turn.
Rows 2-27: Ch 4 (counts as Dc plus ch 1). Sk next st. Dc in next st. *Ch 1. Sk next st. DC in next st. Rep from * to end of row. Turn.
Row 28: Ch 1. Sc in 1st st. *Sc in ch 1 sp. Sc in next st. Rep from * to end. Turn.
Row 29: Ch 1. Sc in next 19 sts. Ch 1. Sk next 2 sts. Sc in next 38 sts. Ch 1. Sk next 2 sts. Sc in last 20 sts. Turn. (81)
Row 30: Ch 1. Sc across row working 2 Sc in ch 1 sp.
DO NOT FASTEN OFF.
Assembly
- With Rs of both panels facing each other, Sc around 3 sides of the bag leaving the top of the bag open.
- If you prefer, you can also whip stitch the panels together.
- Sew in all yarn ends from assembly, and any also any other loose ends.
HAPPY HOOKING!
I would absolutely love to see your how your project turned out! Share your finished work with me on Instagram!
@designsbykey
#dbkeypatterns