

Filet Crochet: The basics

Filet crochet is a crochet technique that consists of solid blocks and open spaces to create intricate images and phrases. The pattern is often achieved by using a filet crochet chart that displays which blocks need to be filled and which ones to leave open. The filet crochet effect is made using a combination of double crochet and chain stitches. Although this technique is fairly easy to learn, it can take some practice to get it right, but don’t worry….I’m here to help.
How to Start Filet Crochet…
When first learning this technique, the most difficult part for me was getting started. Determining the number of chains to begin with was pure torture until I took the time to learn the math behind it. Don’t worry, it’s not anything complicated, but it will save you a lot of headache. In order to know the number of chains needed, you first have to know the number of spaces needed for your design. Next, you would need to know if it will be a 3-DC Filet or 4-DC filet….let me explain.
With 3-DC Filet, 3 double crochet stitches are used to form a solid block. This means that when solid blocks are next to each other, the blocks share a common dc in the middle. So, for example, when there are 3 blocks side by side this equals 7 dc. See below:
4-DC Filet kind of follows the same concept, except instead of 3 dc forming a solid block, it’s 4. This means that when solid blocks are next to each other, the blocks share a common dc in the middle. So, for example, when there are 3 blocks side by side this equals 10 dc. See below:
The Starting Chain…
Now that you know what kind of filet crochet you will be working, and you’ve also got your chart ready, it’s time to put your yarn and hook to work.
If working a chart using 3-dc filet crochet you would take the number of blocks across the first row of your chart, multiply that number by 2, and add 1. This will give you your starting chain. You must add the appropriate number of chains to that for a turning chain as well. If the first block to be worked is solid, then chain 3 (counts as Dc), and begin working in the 6th chain from the hook. If the first block is open, then chain 4 (counts as Dc plus chain 1), and begin working in the 7th chain from the hook.
If working a chart using 4-dc filet crochet you would take the number of blocks across the first row of your chart, multiply that number by 3, then add 1. This will give you your starting chain. You must add the appropriate number of chains to that for a turning chain as well. If the first block to be worked is solid, then chain 3 (counts as Dc), and begin working in the 5th chain from the hook. If the first block is open, then chain 5 (counts as Dc plus chain 2), and begin working in the 9th chain from the hook.
Try it out…
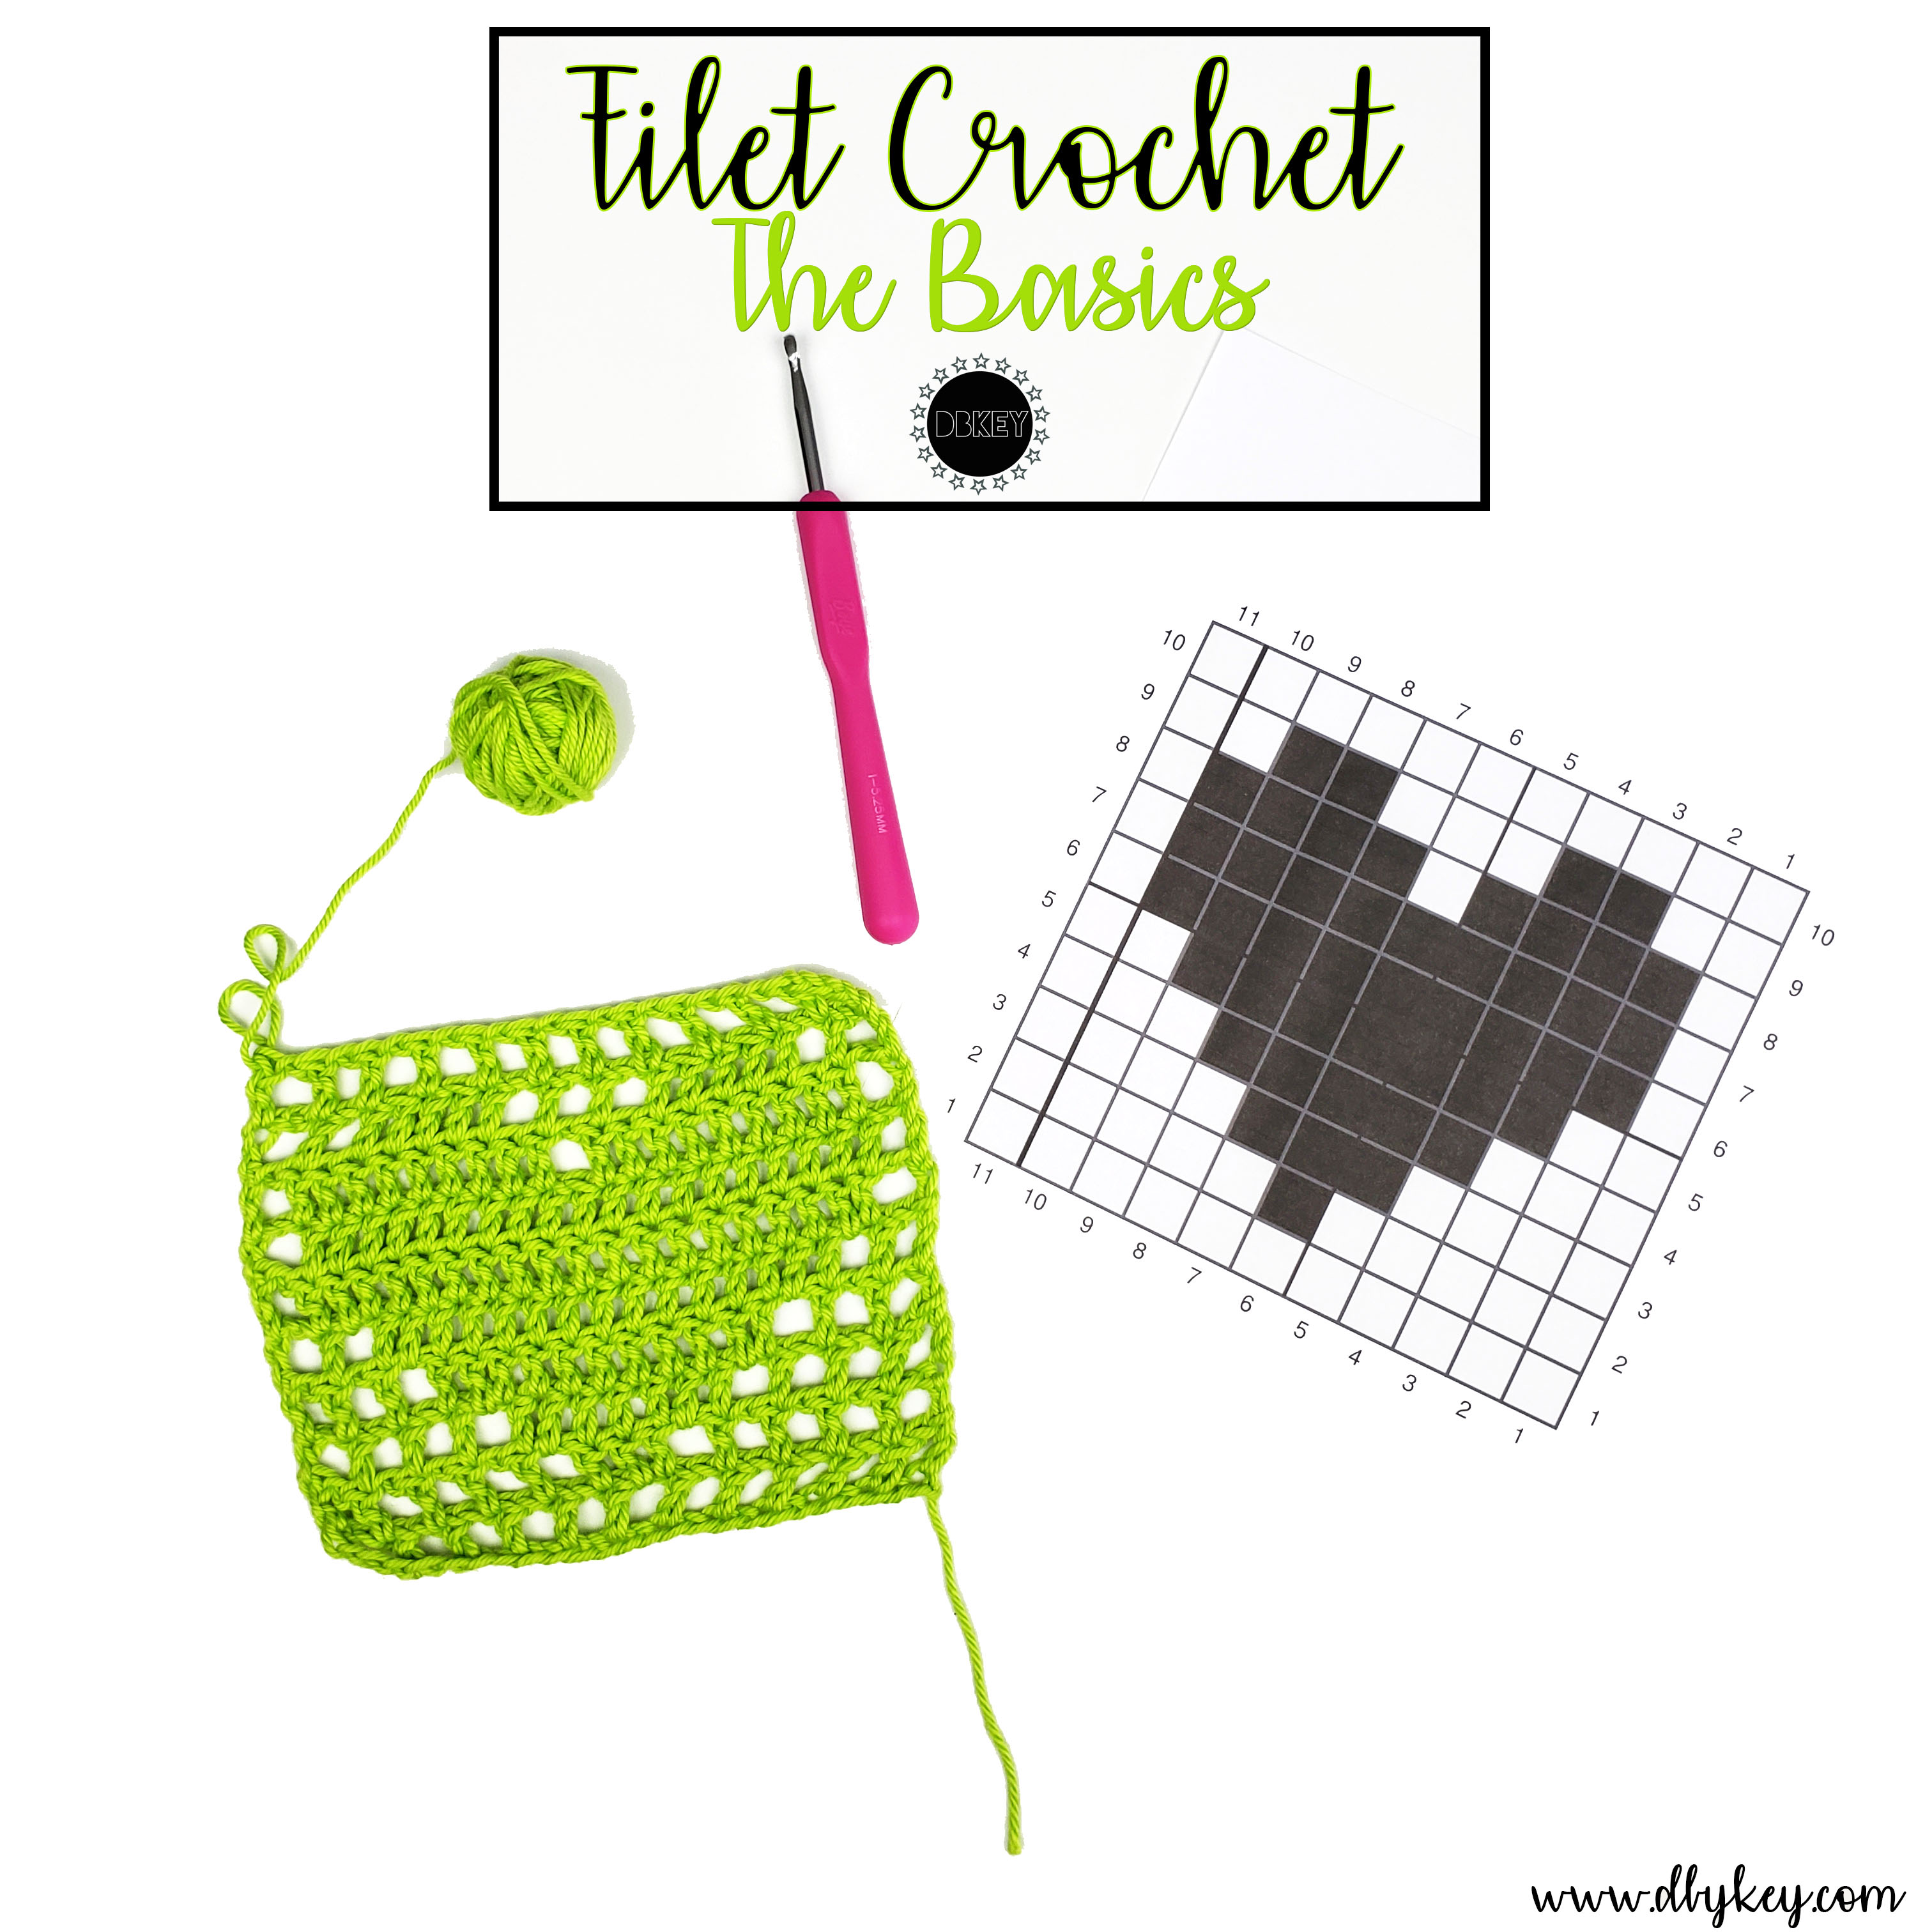
If you’re still confused, don’t give up. I promise it’s easier once you actually start crocheting. The best way to learn is to start with a small project. I’ve included a chart below to start with. Try to create this design using both 3 and 4 Dc filet crochet so you can see the difference between the two. I’ll start by helping you out with the 3 Dc filet.
Take time to look at the chart. Notice that this chart is 11 blocks wide. Remember that when work 3 Dc filet, you take that number and multiply by 2 and add 1. So for this chart, start with a chain of 23. Also, don’t forget to add the turning chain. Since this chart starts with an open block, we will add an additional 4 chains to the already worked 23, for a total of 27 chains.

Row 1: Now that the starting chain is worked, it’s time to start forming the blocks. To form the first block, work a Dc in the 6th chain from the hook. Your first block is now created. Chain 1 to create the open space for the next block, skip 1 chain, and Dc in the next. Now there are 2 open blocks. Chain 1, Skip next chain, and Dc in next, all the way across the row. There are no solid blocks on this row, so it should be completely open.


By now you should have the hang of creating open blocks. When dealing with filet crochet, it is important that you determine the direction that you want to work in as well. I am left handed, so I tend to work from left to right when working in charts, starting with the very bottom left block. Most right handed people like to work the complete opposite, by starting with the bottom right block. Whichever way is best for you is fine, but just remember which direction you are working in for the duration of your project.
Row 2: Turn your work and chain 4 (counts as Dc and chain 1). Now look at row 2 on the chart. There are 5 open blocks, 1 solid block, followed by 5 more open blocks. Once you’ve worked the 5 open blocks, do not chain 1. Instead we are now going to create a solid block by working 1 Dc in the chain 1 space from the previous row. Next, work 1 Dc in the next stitch. You have now created a solid block. Chain 1, Skip next chain, and Dc in next, all the way across to complete the row.

Rows 3-10: Continue following the chart, making sure you’re working in the right direction and also creating the appropriate blocks.
Once you complete all rows your project should look something like this…

See…I knew you could do it. Now, if you’re ready for a project, I’ve got the perfect one for you. Try your hand at the Diamonds in the Back Crochet Mesh Top. I know what you’re thinking, a tooooop?? Yes a top, and I promise it’s super simple and easy. Head on over and take a look or click here to pin it for later.