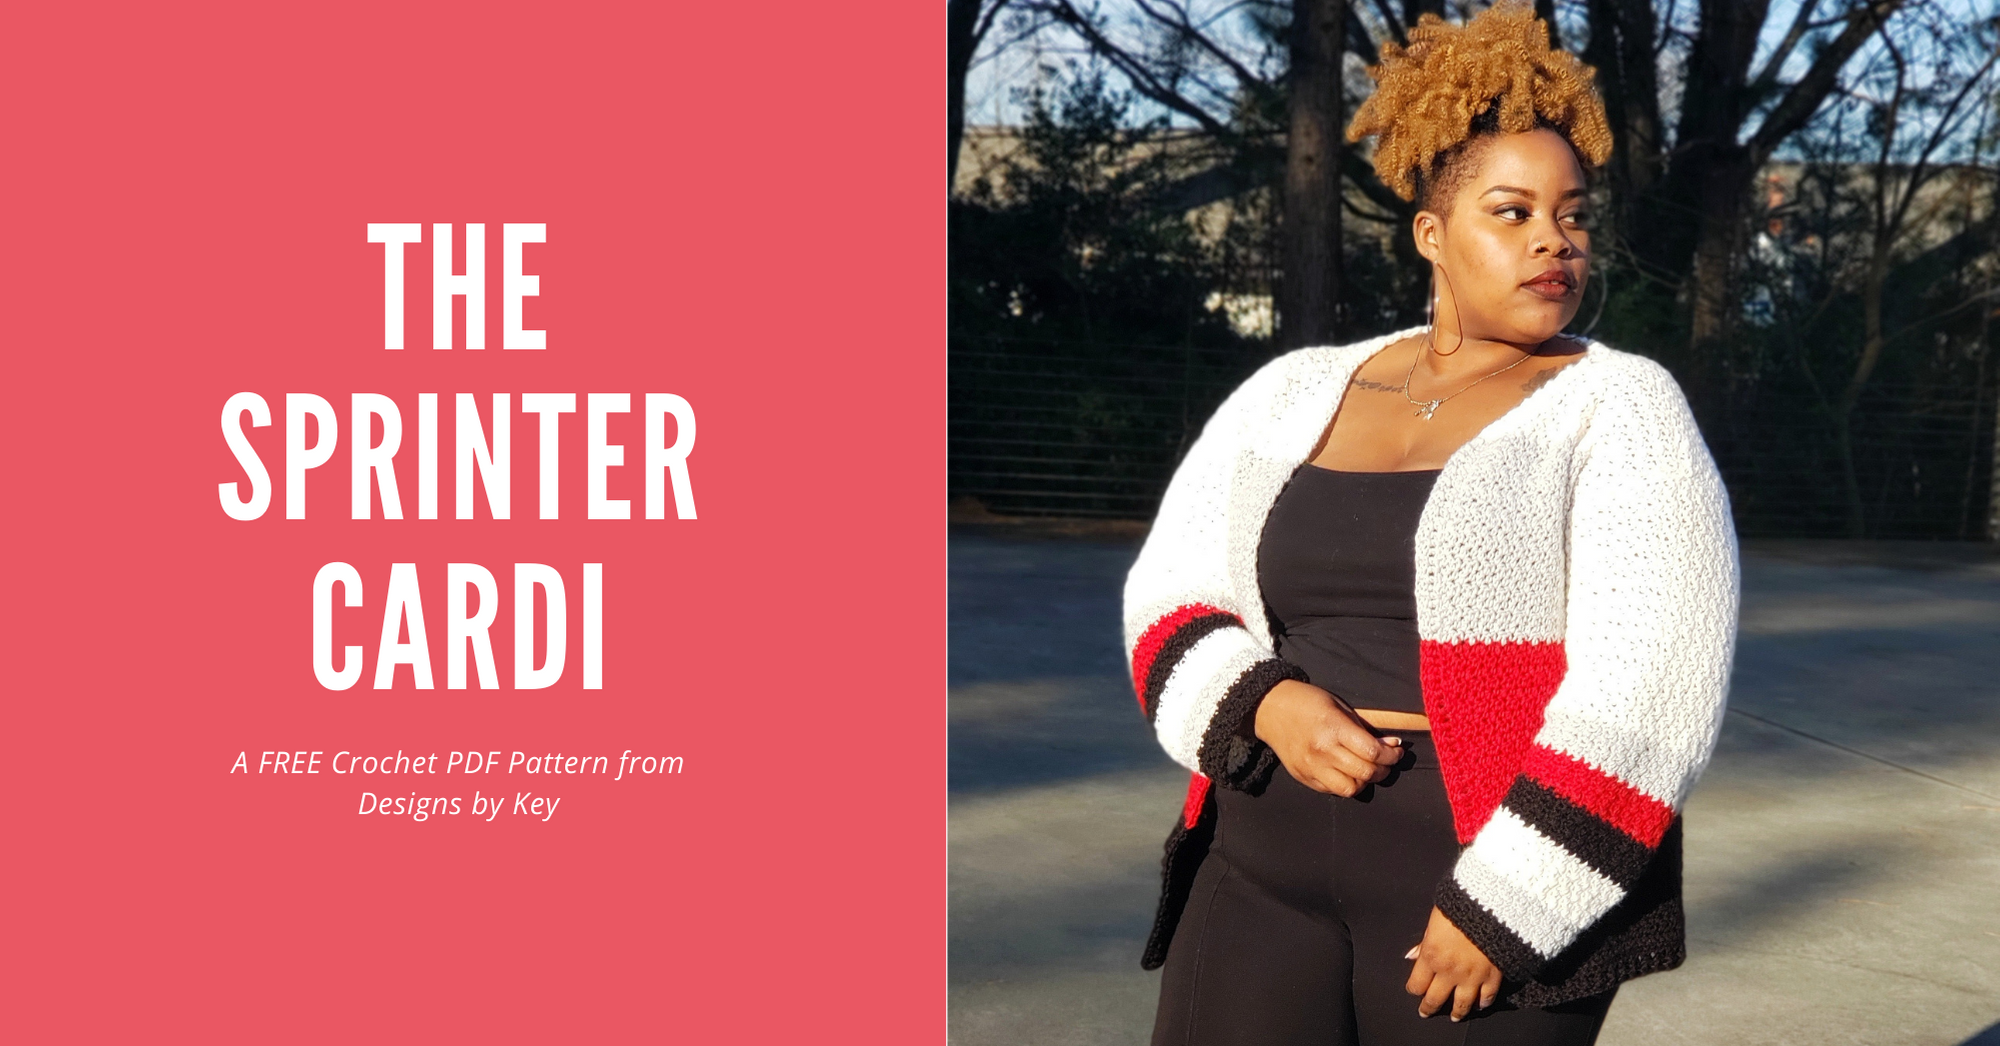
The Sprinter Cardi
Winter is here! Have you crocheted your wardrobe yet? No? Well this one’s for you. Get ready to meet the Sprinter Crochet Cardi – the latest free crochet pattern from Designs by Key. If you’d like to know more about how this crochet cardigan came to be, keep reading! Or scroll down to get right to the free pattern!
This post may contain affiliate links.

There’s something about the New Year that just makes you want to start fresh. New lifestyle changes, new outlook, and new wardrobe. Okay okay…I made the new wardrobe part up, but a girl can dream right? This year, my goal is to crochet my dream wardrobe, and first up is the new Sprinter Cardi.
The Sprinter Cardi has everything that I look for when choosing a crochet cardigan. It’s slightly oversized, has the perfect drape, and can be worn with nearly any outfit. The added bonus is how simple it is to make.

Beginner Friendly….
Never crocheted a garment before? Looking to expand your techniques? No worries! The Sprinter Cardi crochet pattern is designed with you in mind. Created using 3 panels, you will learn seaming techniques and also get a look into how garments are constructed. The Sprinter Cardi is made up of only 2 basic crochet stitches alternating to create a beautifully textured cardigan. With this pattern, you will learn how easy it is to elevate those basic stitches to create something even more stunning. Still learning? Check out the Beginner Series where I’ll show you all the basics.

The Yarn from LoveCrafts…
If you’ve been reading my blog over the last few months, then you know that I’ve completely fallen in love with the Paintbox Yarns line from LoveCrafts. For the Sprinter Cardi, I got the chance to crochet with Paintbox Yarns Wool Mix Aran, and it did not disappoint. I normally avoid wool and wool blend yarn like the plague due to its scratchy nature, but I’m so glad I gave this yarn a try. If I had to blindly guess the fiber of this yarn, I’d lose. It’s a 50/50 wool and acrylic blend that is unbelievably soft, and does not pill. This Wool Mix Aran comes in skeins of 197 yards and in about 50 colors! That’s 50 different ways to be completely blown away. I may or may not have already placed another order for this yarn…you should too!

Yarn Subs…
Can’t get your hands on the Wool Mix Aran by Paintbox Yarns from LoveCrafts? Not a problem! This yarn can be substituted for any worsted weight yarn. Just be sure to check your gauge.
Have you seen the Crochet Bae Tee…


The Sprinter Cardi Crochet Pattern
- Get the printer friendly, ad free PDF version of the pattern here.
- CLICK HERE to pin for later
- CLICK HERE to fave on Ravelry
Materials
- I/5.50 mm crochet hook
- Paintbox Yarns Wool Mix Aran – uses 4 different colors. For exact yarn amounts, download the Ad-Free PDF.
- C1 – Pure Black
- C2 – Pillar Red
- C3 – Stormy Grey
- C4 – Paper White
- Scissors
- Stitch Markers
- Tapestry Needle for weaving in ends
- Your favorite show to “watch”
Gauge
- 4 inch square = 12 sts x 12 rows over stitch pattern
- Stitch Pattern: Fsc 15 (must be odd number).
- Ch 2. Dc in first st. *Sc in next st. Dc in next st. Rep from * to end. Turn.
- Ch 1. Sk first st. *Dc in next sc. Sc in next dc. Rep from * to end. Dc in t-ch. Turn.
- Rep previous step until 4 inches tall.
- Measure.
Finished Size
- Bust – 32(36, 40, 44, 48, 52, 56, 60, 64)”
- XS(S, M, L, XL, 2XL, 3XL, 4XL, 5XL)
- 1.5-2″ of positive ease. Be sure to check gauge.
- For exact measurements, download the Ad-Free PDF.
Abbreviations
- Ch – chain
- Dc – double crochet
- St – stitch
- Sts – stitches
- Sl st – slip stitch
- Sc – single crochet
- Rep – repeat
- Sk – skip
- T-ch – turning chain
- Rs – right side
- Fpdc – front post double crochet
- Bpdc – back post double crochet
Pattern Notes
- The pattern is written for size XS with S, M, L, XL, 2XL, 3XL, 4XL, and 5XL in parentheses. Be sure to follow the instructions for the size you’re making.
- The pattern is worked in panels from the bottom up.
- Sleeves are worked from the top down.
- Turning chains count as a stitch.
- For assembly, the use of stitch markers is highly recommended to ensure blocks of color are aligned.
- The measurements of the finished piece are taken with the cardigan laying flat, but due to the loose nature of the finished piece, it will stretch when worn.
Special Stitches
- Fsc – Foundation single crochet. Click here to learn more about foundation stitches.
- Dc3tog – [Yarn over, insert hook in next stitch, yarn over and pull up loop, yarn over, draw through 2 loops] 3 times (4 loops on hook), yarn over, draw through all loops on hook.
Start Here…
Back Panel
Row 1 (RS): Using C1, fsc 47(53, 59, 65, 71, 77, 83, 89, 95). Turn.
Row 2: Ch 2. Dc in first st. *Sc in next st. Dc in next st. Rep from * to end. Turn.
Row 3: Ch 1. Sk first st. *Dc in next sc. Sc in next dc. Rep from * to end. Dc in t-ch. Turn.
Rows 4-20: Rep row 3.
Next Steps: Rep rows 3-20 with each color in the following color sequence.
- C2 – Pillar Red
- C3 – Stormy Grey
Rows 57-65(65, 65, 68, 68, 68, 68, 69, 69): Using C4, rep row 3.
Front Panel (Make 2)
Row 1 (RS): Using C1(Pure Black), fsc 17(19, 23, 25, 29, 31, 35, 37, 41). Turn.
Row 2: Ch 2. Dc in first st. *Sc in next st. Dc in next st. Rep from * to end. Turn.
Row 3: Ch 1. Sk first st. *Dc in next sc. Sc in next dc. Rep from * to end. Dc in t-ch. Turn.
Rows 4-20: Rep row 3.
Next Steps: Rep rows 3-20 with each color in the following color sequence.
- C2 – Pillar Red
- C3 – Stormy Grey
Rows 57-58: Using C4 (Paper White), rep row 3.
Row 59: Ch 1. Sk first st. *Dc in next sc. Sc in next dc. Rep from * to last 3 sts. Dc3tog. Turn.
Row 60: Rep row 3.
Rows 61-65(65, 65, 68, 68, 68, 68, 69, 69): Rep rows 59-60 consecutively.
Fasten off.
Sleeve (Make 2)
Row 1: Using C4, fsc 39(41, 45, 47, 51, 53, 57, 59, 63). Turn.
Row 2: Ch 2. Dc in first st. *Sc in next st. Dc in next st. Rep from * to end. Turn.
Row 3: Ch 1. Sk first st. *Dc in next sc. Sc in next dc. Rep from * to end. Dc in t-ch. Turn.
Rows 4-23: Rep row 3.
Rows 24-25: Ch 1. Sk first st. *Dc in next sc. Sc in next dc. Rep from * to last 3 sts. Dc3tog. Turn.
Rows 26-28: Rep row 3.
Change to C3.
Rows 29-33: Rep row 3.
Change to C2.
Rows 34-35: Rep row 24.
Rows 36-38: Rep row 3.
Change to C1.
Rows 39-43: Rep row 3.
Change to C4
Rows 44-45: Rep row 24.
Rows 46-48: Rep row 3.
Rows 49-50: Rep row 24.
Change to C3
Rows 51-55: Rep row 3.
Change to C1
Rows 56-60: Rep row 3.
Fasten off.
Assembly
Note: The use of stitch markers is highly recommended to be sure blocks of color stay aligned throughout the seaming process. When seaming, use the yarn that matches the block of color for a cleaner finish.
Sleeve Assembly
- Fold sleeve lengthwise with RS together, making sure that all blocks of color are aligned.
- Using tapestry needle and yarn, seam the edges of the sleeve together.
- Fasten off and weave in ends. Turn sleeve right side out.
- Repeat for other sleeve.
Panel Assembly
- Lay back panel with RS facing up. Lay the front panels on top of the back panel as shown.
- Using C4, seam front panels to back panel across the shoulder only.
- Starting at the bottom and working upwards, seam the sides of the front panels to the back panel leaving an armhole depth of 6.5(7, 7.5, 8, 8.5, 9, 9.5, 10, 10.5)”.
- Weave in all ends. Turn piece right side out.
Sleeve Attachment
- With sleeve and body still inside out, use tapestry needle to seam sleeve to the armhole created during panel assembly. Be sure the seams from both pieces are aligned.
- Repeat for other sleeve.
- Weave in all ends.
- Turn piece RS out.
Edging
Note: For the edging, use the same color yarn that matches the block of color that you are working into. For a thicker edge, rep row 3 until desired width.
- With piece laying RS up, attach yarn (C1) to the bottom edge of right panel (bottom edge of left panel if you’re left handed.).
- Ch 2 (does not count as a st).
- Working upward around the neckline, down the side of the opposite panel, and around the bottom of the piece, Dc around evenly. Sl st to first st.
- Row 2: Ch 2. Dc in same st. *Bpdc. Fpdc. Rep from * around. Dc in last st.
- Row 3: Ch 2. Dc in same st. *Fpdc. Bpdc. Rep from * around. Dc in last st.
- Fasten off.
Weave in all ends.